

Introduction
SCIM (System for Cross-domain Identity Management) is an open standard that lets your identity provider (IdP) manage the users of an application. Once SCIM is connected, your IdP keeps Qobra up to date on its own:- a user assigned to the Qobra app in your IdP is created in Qobra;
- a change to their name or email in your IdP is applied in Qobra;
- a user unassigned, deactivated or deleted in your IdP loses access to Qobra.
Okta, Microsoft Entra ID and any SCIM 2.0 compliant identity provider.
SCIM manages users only. It doesn’t assign user groups, plans or the org
chart: you keep managing them in Qobra.
Before you start
- You need a Qobra role with write access to the integration settings (company settings).
- You need admin access to your identity provider to create an application and configure its provisioning.
- SCIM is configured on your live environment only: the settings are read-only in a sandbox.
Step 1: Set up SCIM in Qobra
1
Open the user provisioning settings
In Qobra, go to Settings > User provisioning and click Set up SCIM
on the From your identity provider card.
2
Choose what happens to new users
In the New users step, choose how Qobra creates the users your
identity provider sends: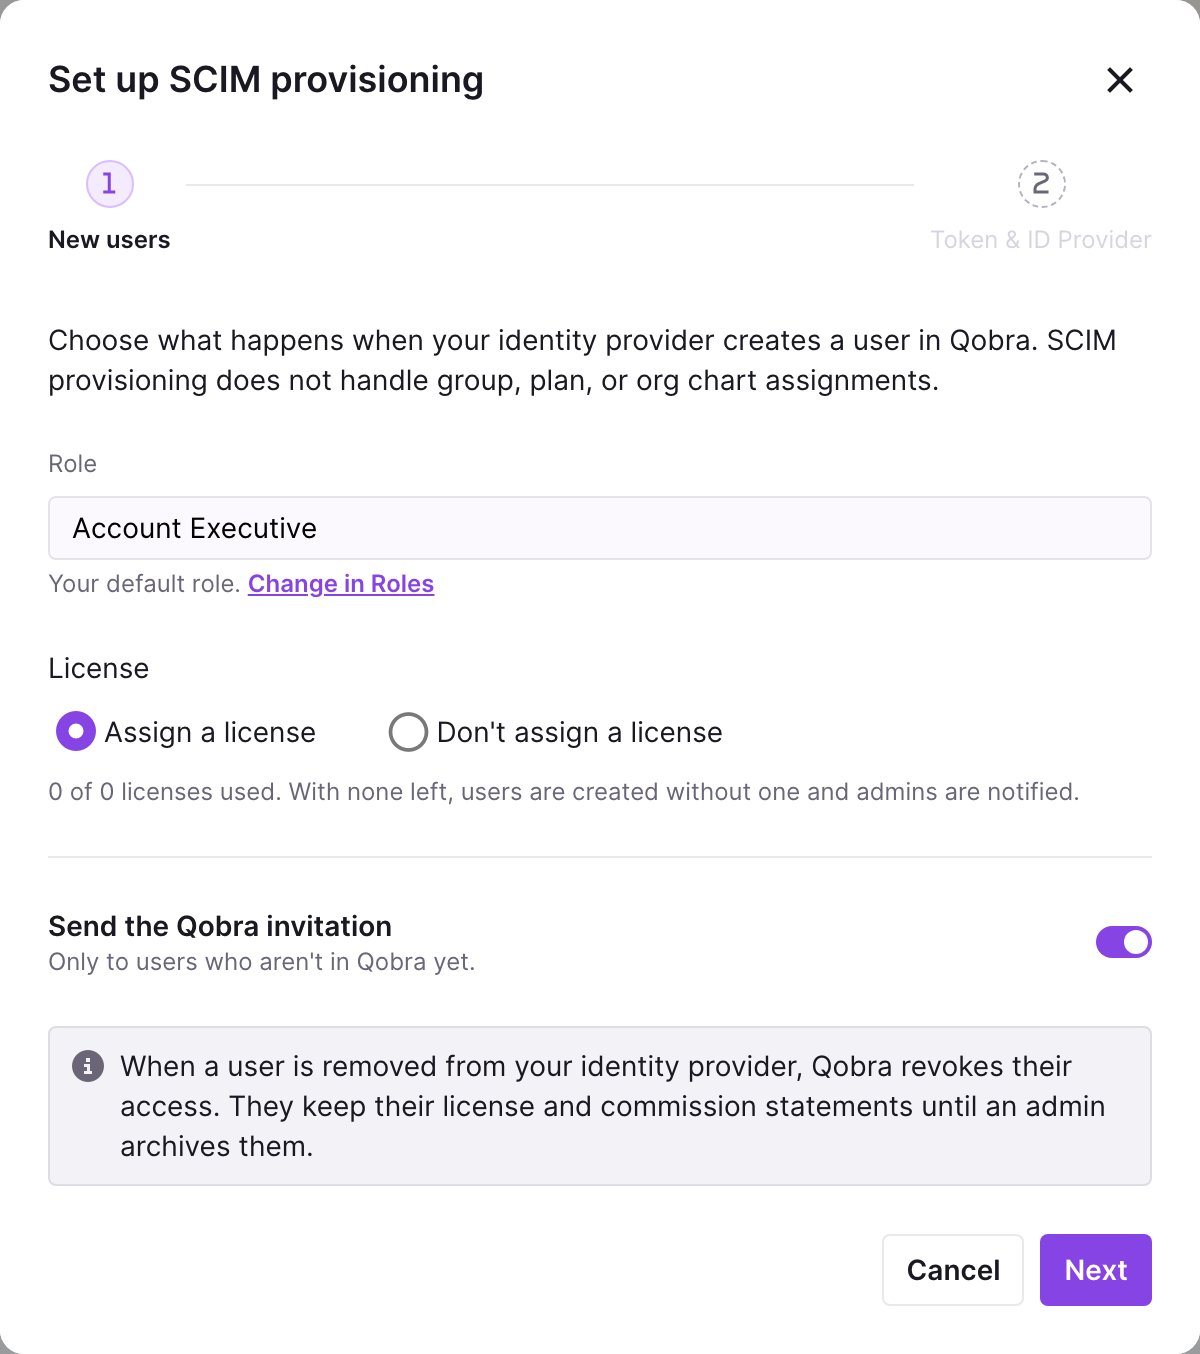
- Role: new users get the default role of your company. You can change it in Settings > Roles.
- License: Assign a license to each new user, or Don’t assign a license. When no license is left, the user is created without one.
- Send the Qobra invitation: send the invitation email to new users, or not. It is only sent to users who aren’t in Qobra yet.
3
Copy the base URL and the token
Click Next. The Token & ID Provider step shows the two values your
identity provider needs: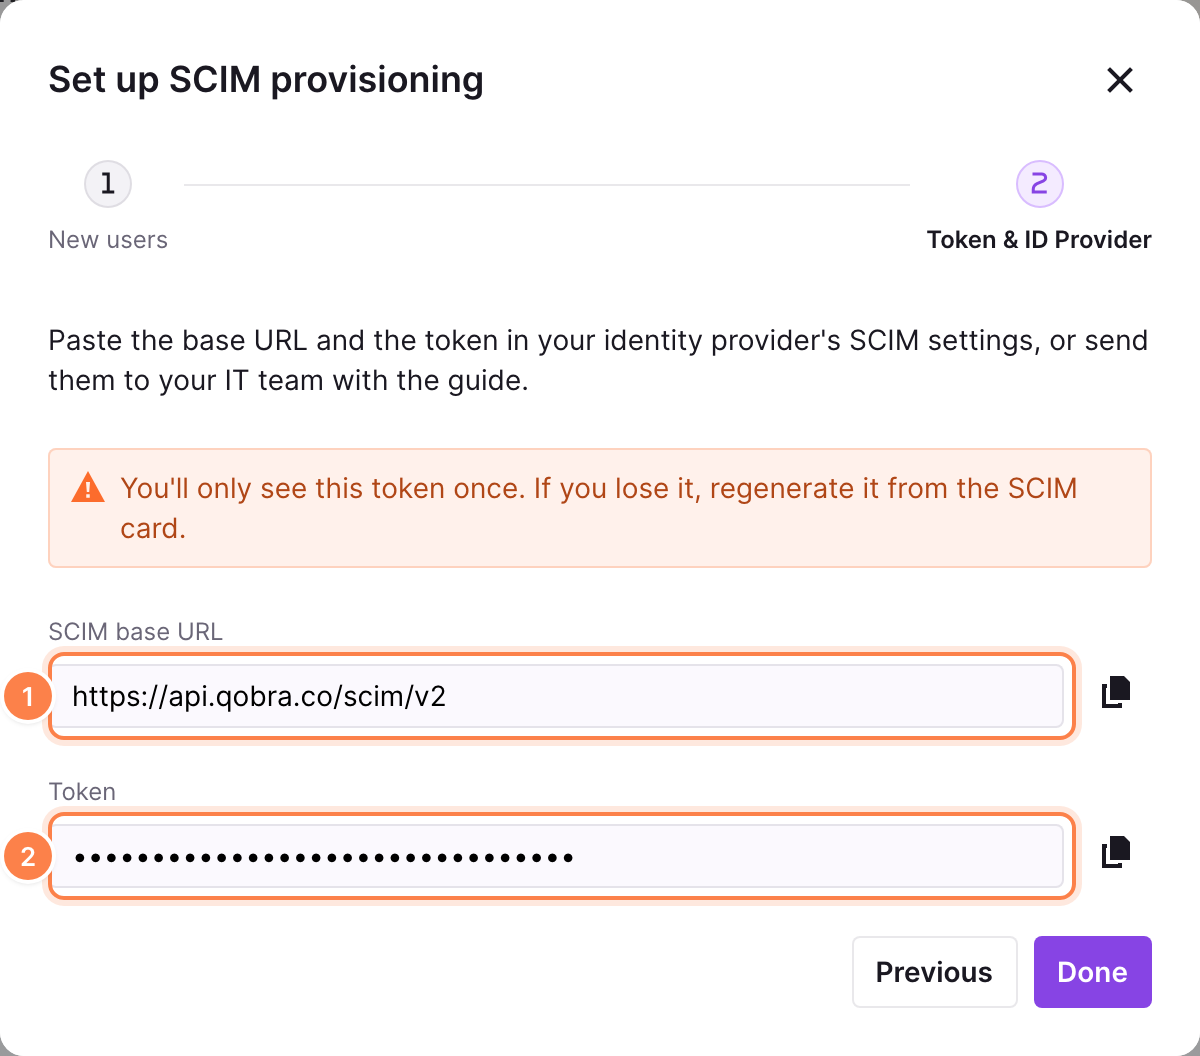
- SCIM base URL (1):
https://api.qobra.co/scim/v2 - Token (2): the secret your identity provider sends with every request.
Step 2: Connect your identity provider
- Okta
- Microsoft Entra ID
- Other providers
1
Create the Qobra application
In the Okta Admin Console, go to Applications > Applications and
click Create App Integration. Select SAML 2.0 (or SWA if you
don’t use SSO) and give the application a name, such as
Qobra.2
Turn on SCIM
In the General tab of the application, click Edit in
App Settings, select SCIM as the provisioning option and save.
3
Configure the SCIM connection
In the Provisioning tab, open Integration and click Edit:
SCIM connector base URL: the SCIM base URL copied from Qobra.Unique identifier field for users:userName.Supported provisioning actions: Push New Users and Push Profile Updates.Authentication Mode: HTTP Header, then paste the Qobra token in Authorization.
4
Enable the provisioning actions
In Provisioning > To App, click Edit and enable
Create Users, Update User Attributes and Deactivate Users.
5
Assign users
In the Assignments tab, assign the people or the Okta groups who
should have a Qobra account. Okta creates them in Qobra right away.
How Qobra handles users
Creation
When your identity provider creates a user, Qobra:- uses their work email as their Qobra login email (or their primary email,
or their
userNameif they have no email); - names them with their given and family names, or with
name.formatted, or withdisplayName; - applies the role, license and invitation settings you chose.
Updates
Name and email changes made in your identity provider are applied in Qobra.The email of a user who existed in Qobra before SCIM is never changed by your
identity provider: only users created through SCIM have their email updated.
Deactivation and deletion
When a user is deactivated, unassigned or deleted in your identity provider, Qobra revokes their access. They can no longer sign in, but they keep their license and commission statements until an admin archives them in Qobra. When your identity provider reactivates or reassigns the user, Qobra restores their access. If your identity provider gives theuserName of a deleted user to someone
else, Qobra creates a new user for that person instead of reusing the former
account.
Supported attributes
Manage the token
Once SCIM is set up, the card in Settings > User provisioning is marked Active and sums up your settings for new users.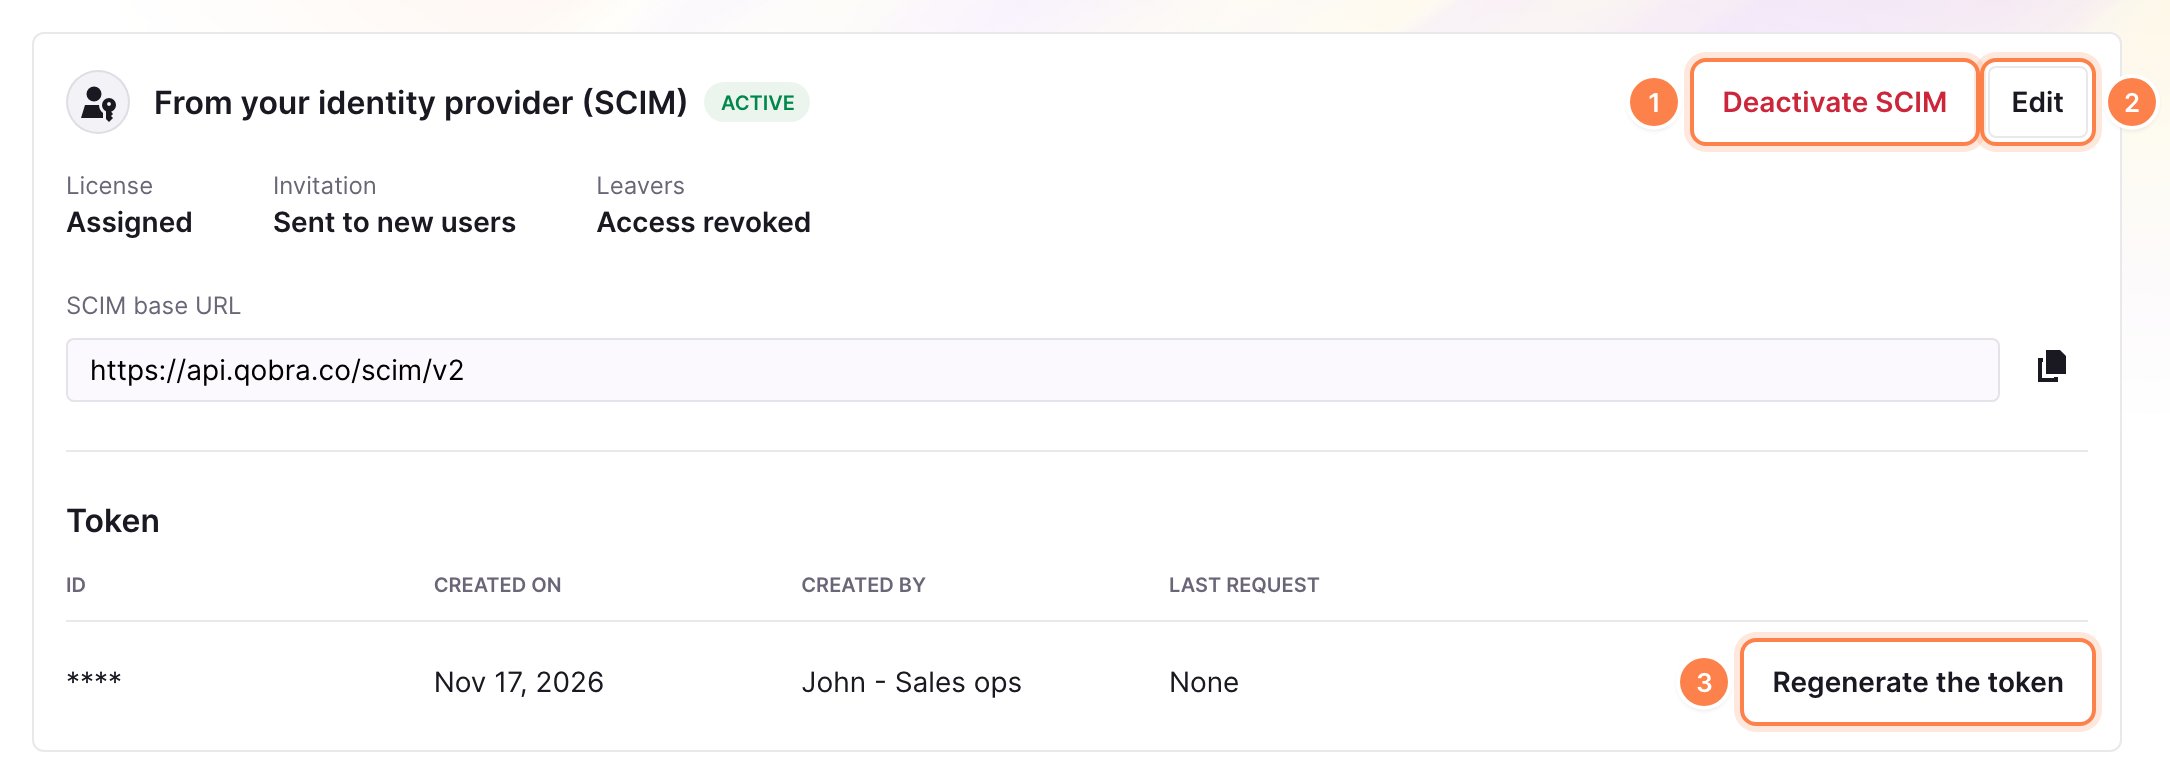
- Deactivate SCIM (1): the token stops working right away and your identity provider can no longer create users or revoke their access. The users it created stay in Qobra.
- Edit (2): change the role, license and invitation settings for the users created afterwards.
- Regenerate the token (3): the current token stops working right away. Paste the new one in your identity provider to keep provisioning users.
API reference
The SCIM API is available athttps://api.qobra.co/scim/v2 and authenticated
with the token as a bearer token. It supports:
Filtering and pagination
Filtering and pagination
GET /Users supports the userName eq "..." filter, case insensitive, and
pagination with startIndex and count (100 users per page at most).Not supported
Not supported
Groups, bulk operations, sorting, ETags and password changes are not
supported.
/ServiceProviderConfig describes what is.Errors and rate limit
Errors and rate limit
Errors follow the SCIM error format. A
userName or an email already used
by another user returns 409 with the uniqueness type. Requests are
limited to 80 per second per token.Troubleshooting
The connection test fails
The connection test fails
Check that the base URL ends with
/scim/v2 and that the token was pasted
in full. A 401 means the token is invalid, regenerated or SCIM was
deactivated: generate a new token from the SCIM card.A user is not created
A user is not created
Check that the user is assigned to the Qobra application in your identity
provider and has a valid email. A
409 error means the email or the
userName is already used by another user.A user still has access after leaving
A user still has access after leaving
Check that deactivation is enabled in your identity provider (Deactivate
Users in Okta) and, for Microsoft Entra ID, that the provisioning cycle
has run.