

Setup
- Create a dedicated account to set up the Qobra connection, following the principle of least privilege. This means the account should have read-only access to the tables that need to be synchronized with Qobra. You’ll find Snowflake’s documentation regarding User, role, and privilege commands here.
- Whitelist Qobra’s IP address:
13.39.2.144(infra EU) or18.206.233.133(infra US). - Configure key-pair authentication to enable the Snowflake integration within the Qobra application. We recommend following the official Snowflake documentation to correctly generate and configure the key pair required to complete the connection.
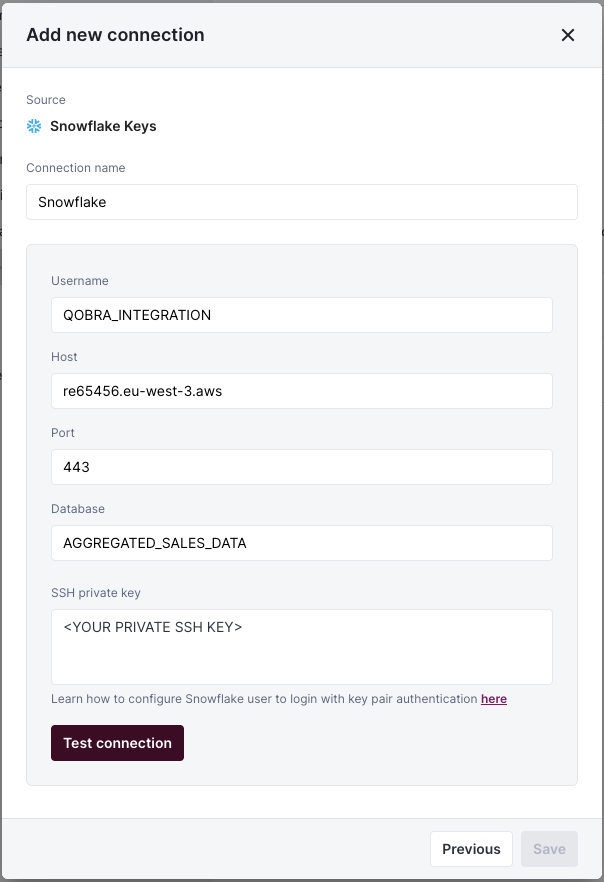
- You’ll then be able to fill in the connection modal in app:
Username: Snowflake account usernameHost: Snowflake account’s unique URLPort: by default443for encrypted (TLS/SSL) connectionsDatabase: Snowflake databaseSSH private key: The private SSH key generated at step 3
Synchronization
Custom queries are based on SQL where conditions. For instance, you could add as a custom query
StageName = 'Closed Won’ to filter your Opportunity object.
Contact support for more information.