> ## Documentation Index
> Fetch the complete documentation index at: https://docs.qobra.co/llms.txt
> Use this file to discover all available pages before exploring further.
# Connect an MCP client to Qobra
> Prerequisites, the OAuth consent flow, and adding the MCP server to Claude, ChatGPT or Dust
## Prerequisites
The server is gated by a per-company feature flag (`MCP`). Ask the Qobra
team to enable it for your workspace before connecting.
You authenticate as yourself. The tools only ever return data your Qobra
user is allowed to see — the same role-based permissions as the app.
## Server URL
The server speaks **Streamable HTTP** and is available at `https://mcp.qobra.co/mcp`.
There is **no API key**. Every client authenticates through the same OAuth 2.1
flow described in [Authorize](#authorize-oauth-consent) below — you only ever
paste the server URL, never a secret.
## Add the server to your client
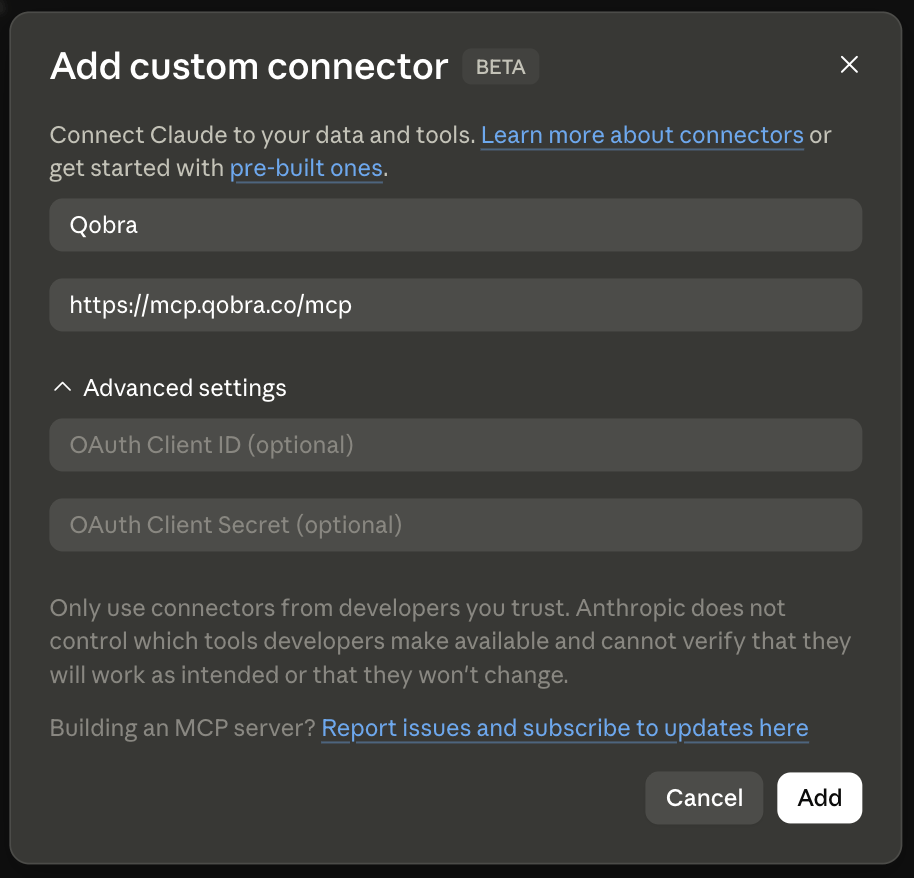
Open **Settings → Connectors → Add custom connector**, give it a name (e.g.
`Qobra`) and paste the server URL (`https://mcp.qobra.co/mcp`). Leave the
Advanced settings (OAuth Client ID / Secret) empty.
 Custom MCP connectors live behind **Developer mode**, available on
**ChatGPT Plus, Pro, Business, Enterprise and Edu** plans. Open
**Settings → Connectors → Advanced** (`chatgpt.com/apps#settings/Connectors/Advanced`)
and click **Create** to open the **New App** dialog.
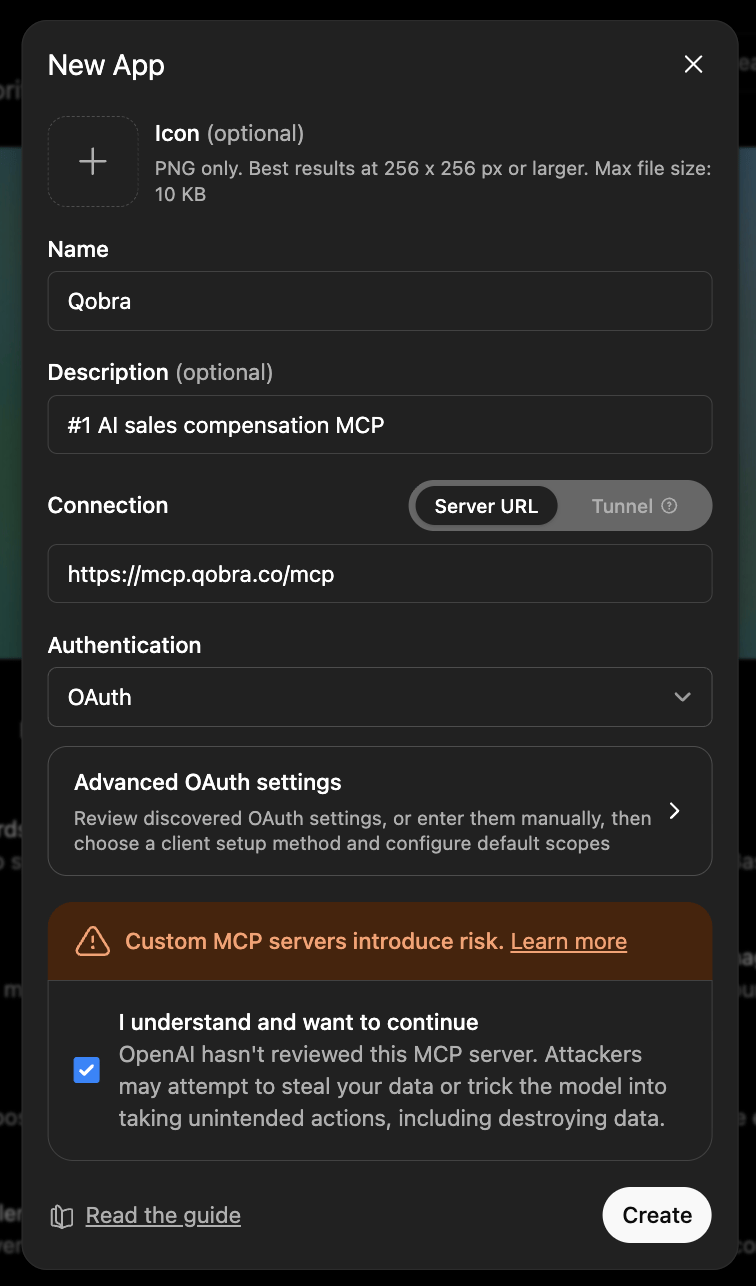
Enter a **Name** (e.g. `Qobra`). The icon and description are optional.
Under **Connection**, keep **Server URL** selected and paste
`https://mcp.qobra.co/mcp`.
Set **Authentication** to **OAuth**. You can leave the **Advanced OAuth
settings** as discovered — the server registers the client automatically.
Tick **I understand and want to continue** (the standard warning for any
custom MCP server), then click **Create**.
Custom MCP connectors live behind **Developer mode**, available on
**ChatGPT Plus, Pro, Business, Enterprise and Edu** plans. Open
**Settings → Connectors → Advanced** (`chatgpt.com/apps#settings/Connectors/Advanced`)
and click **Create** to open the **New App** dialog.
Enter a **Name** (e.g. `Qobra`). The icon and description are optional.
Under **Connection**, keep **Server URL** selected and paste
`https://mcp.qobra.co/mcp`.
Set **Authentication** to **OAuth**. You can leave the **Advanced OAuth
settings** as discovered — the server registers the client automatically.
Tick **I understand and want to continue** (the standard warning for any
custom MCP server), then click **Create**.
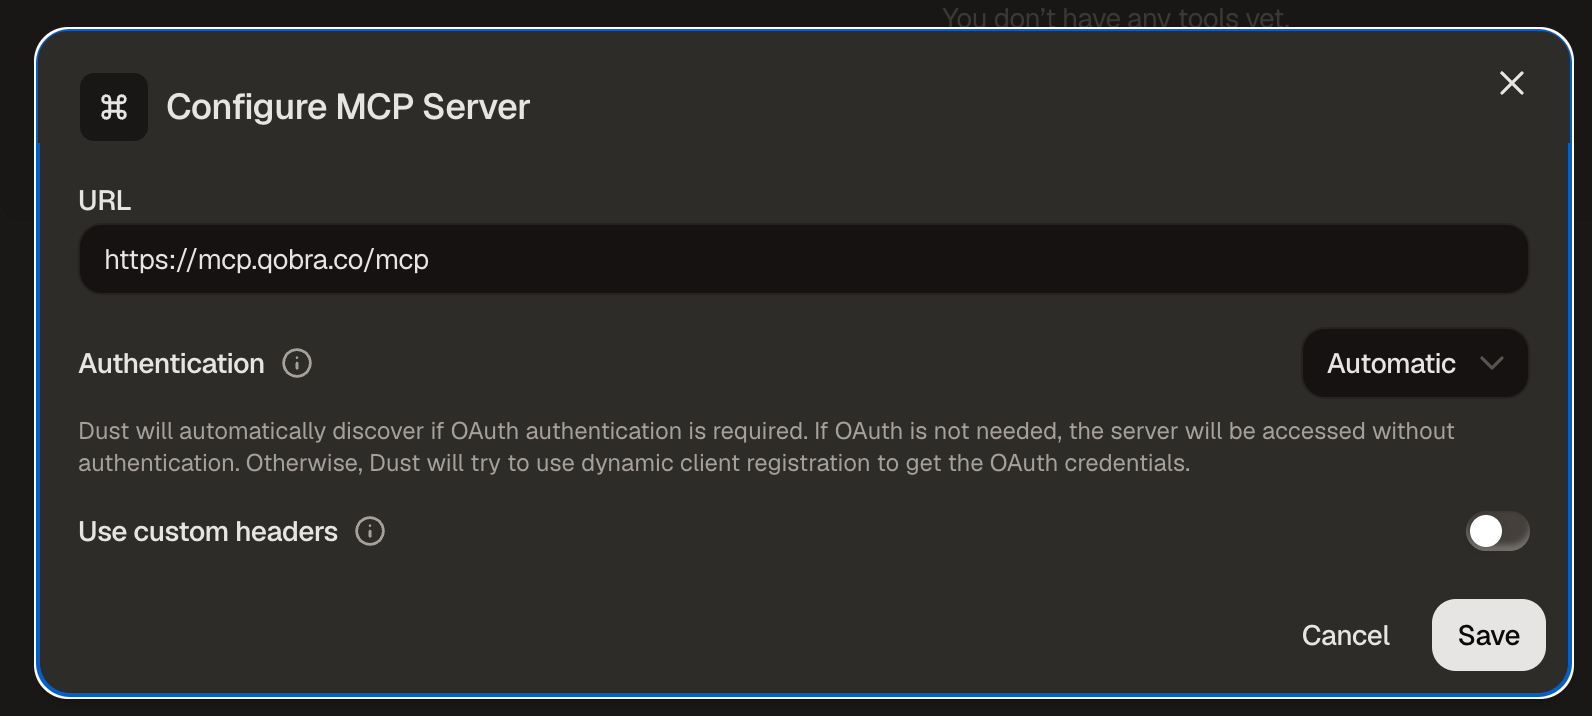
 Add Qobra as a **remote MCP server** from a Dust space. Open your space's
**Tools** (the *Actions* category), then **Add MCP Server** to open the
**Configure MCP Server** dialog.
In **URL**, paste `https://mcp.qobra.co/mcp`.
Keep **Authentication** set to **Automatic**. Dust discovers that the
server requires OAuth and uses dynamic client registration to obtain the
credentials. Leave **Use custom headers** off.
Click **Save**, complete the OAuth consent, then add the Qobra tools to
an agent so it can query your Qobra data.
Add Qobra as a **remote MCP server** from a Dust space. Open your space's
**Tools** (the *Actions* category), then **Add MCP Server** to open the
**Configure MCP Server** dialog.
In **URL**, paste `https://mcp.qobra.co/mcp`.
Keep **Authentication** set to **Automatic**. Dust discovers that the
server requires OAuth and uses dynamic client registration to obtain the
credentials. Leave **Use custom headers** off.
Click **Save**, complete the OAuth consent, then add the Qobra tools to
an agent so it can query your Qobra data.
 ## Authorize (OAuth consent)
The server is protected by **OAuth 2.1 + PKCE** — there is no API key to copy.
The flow is identical for every client (Claude, ChatGPT, Dust). On first use:
The client discovers the server's OAuth metadata and registers itself
automatically.
The client opens the Qobra consent screen in your browser. Log in to Qobra
as usual (SSO / MFA included) and click **Authorize**.
The client receives a short-lived token and the Qobra tools appear in its
toolbox. Tokens are scoped to your user and company, and can be revoked.
## Authorize (OAuth consent)
The server is protected by **OAuth 2.1 + PKCE** — there is no API key to copy.
The flow is identical for every client (Claude, ChatGPT, Dust). On first use:
The client discovers the server's OAuth metadata and registers itself
automatically.
The client opens the Qobra consent screen in your browser. Log in to Qobra
as usual (SSO / MFA included) and click **Authorize**.
The client receives a short-lived token and the Qobra tools appear in its
toolbox. Tokens are scoped to your user and company, and can be revoked.