> ## Documentation Index
> Fetch the complete documentation index at: https://docs.qobra.co/llms.txt
> Use this file to discover all available pages before exploring further.
# SFTP
## Introduction
Qobra can connect and synchronize `csv` files thanks to the SFTP protocol.
⚠️ You are pushing files on Qobra's SFTP server. Only one SFTP is allowed for a company.
## SSH key generation
You can write data in our SFTP server using SSH Key pair as authentication.
You authenticate using your private key on your machine and we use your
public key to verify the sender. When you generate an SSH key, you can add
a passphrase to further secure the key. If so, you must enter the passphrase
each time you use the key. If you don't already have an SSH key, you must
generate a new SSH key to use for authentication.
You can generate a new SSH key on your machine. After you generate the key,
keep the public part of the key to provide it to Qobra later on. Key type
allowed are `rsa`, `ed25519`, `sha2` and `ecdsa`.
1. Open Terminal.
2. Paste the text below, replacing the email used in the example with your
qobra user email address.
```bash theme={null}
ssh-keygen -t ed25519 -C "your_email@example.com"
```
or
```bash theme={null}
ssh-keygen -t rsa -b 4096 -C "your_email@example.com"
```
When you're prompted to "Enter a file in which to save the key", you can
press Enter to accept the default file location.
3. At the prompt, type a secure passphrase if you want to. If you don't want
to have a passphrase just press enter.
## Setup in Qobra
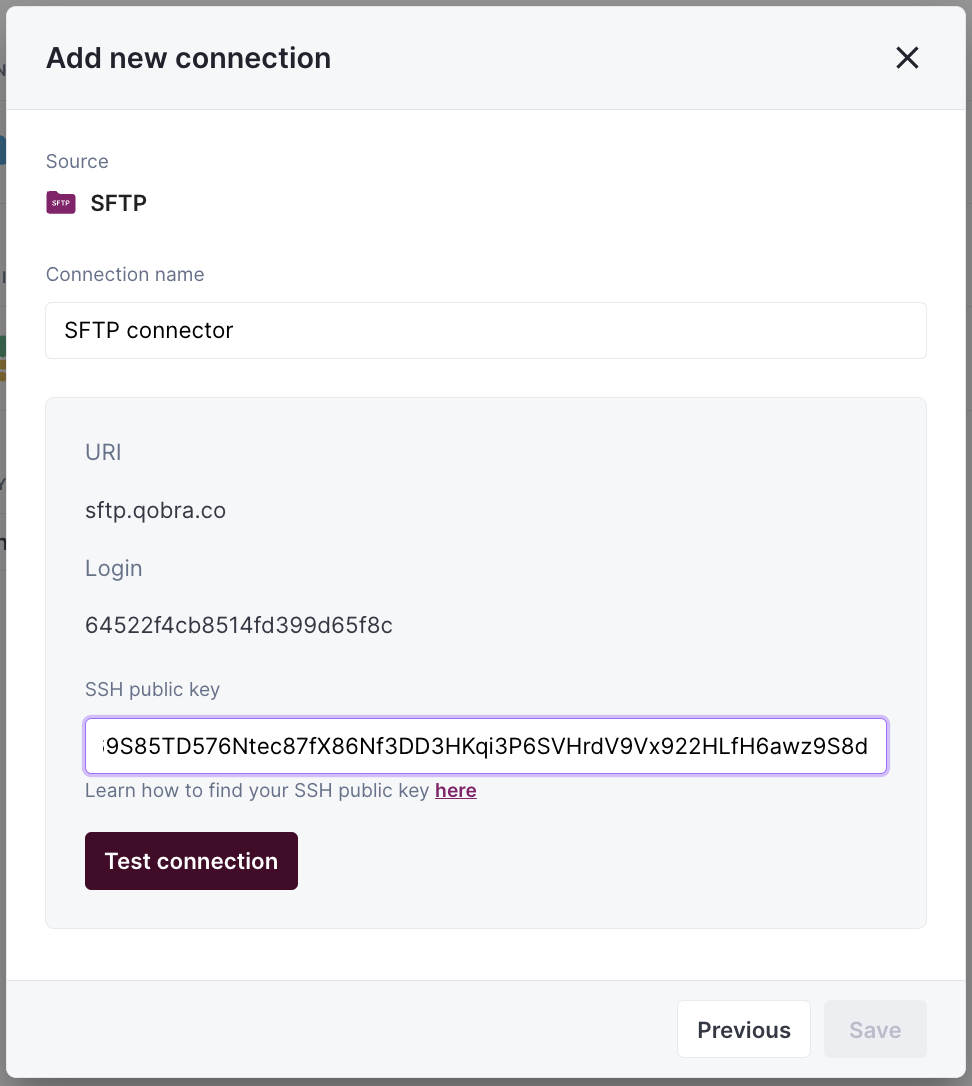
1. Create the SSH key that will authenticate you when you send Qobra files via
SFTP. Keep the public part of the key to provide it to Qobra later on.
Be careful, Qobra only lets you use a single SSH key for all synchronized
files with SFTP. Make sure that every data source that will push to our
SFTP server use the same key.
2. Fill in the integration modal with your SSH public key.
 3. Push your `csv` files via SFTP, with the SSH key you created in step 1.
## Synchronization
### CSV file requirements
To synchronize a file to Qobra, it must meet requirements:
* the file has a `csv` format, with `;` separator
* the file does not change name
* the file contains a **unique identifier** column
* the file contains a **name** column
* the date values contained in the file must follow this format: `YYYY-MM-DD`
* the user values contained in the file must be emails by default, but it can
be changed in app at table creation
### Total synchronization
This integrations does total synchronization, meaning the whole document will
be synced at every refresh.
### Refresh Schedule
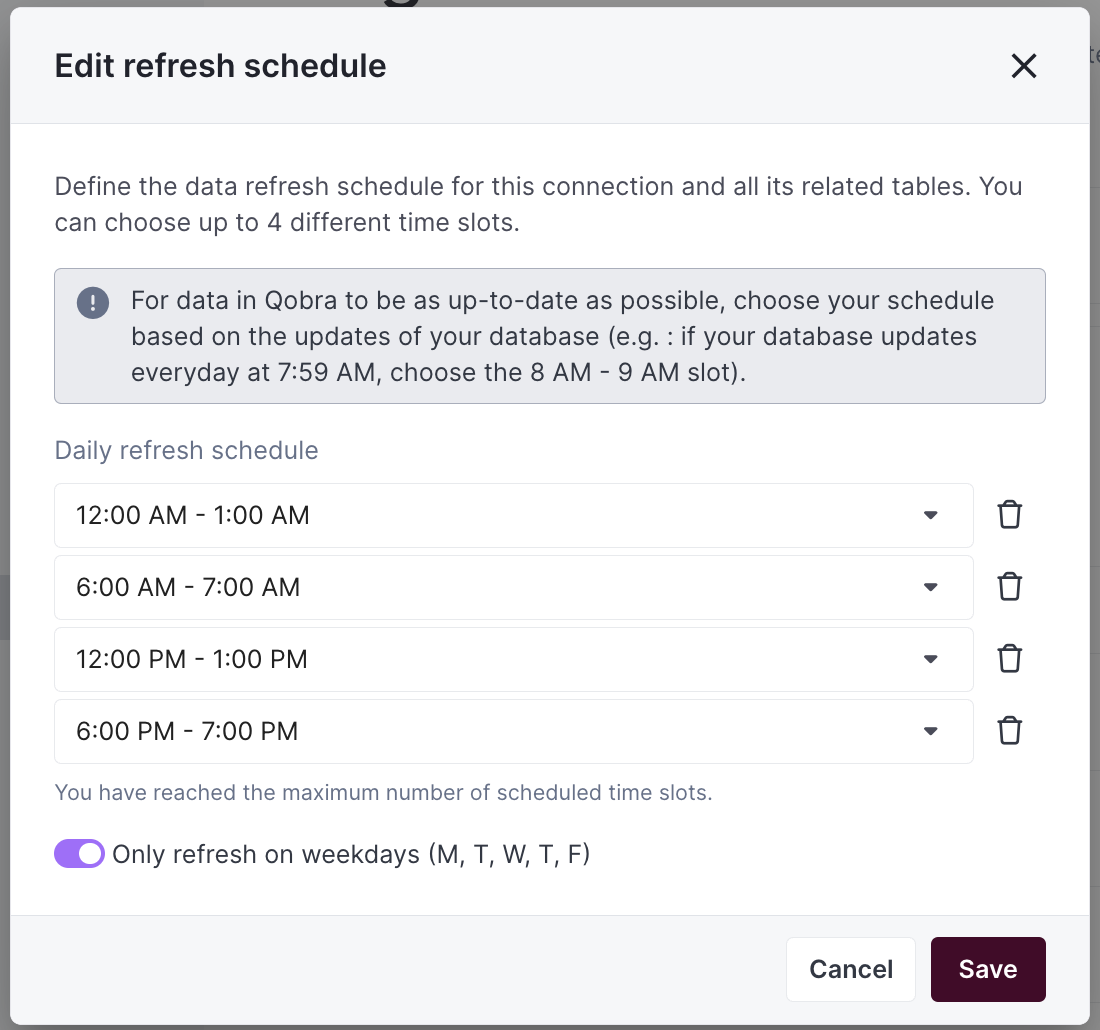
By default, we perform one Full Refresh per day to keep your data up to date. However, you can customize both the frequency and timing of these refreshes to better suit your needs:
* **Default Schedule**: one Full Refresh per day
* **Customizable Options**:
* Adjust the number of daily refreshes
* Set specific hours for the refreshes to occur
* Configure the schedule through your integration settings
* **On-Demand Updates**: Need the latest data right away? Just click the refresh button in your integration settings
3. Push your `csv` files via SFTP, with the SSH key you created in step 1.
## Synchronization
### CSV file requirements
To synchronize a file to Qobra, it must meet requirements:
* the file has a `csv` format, with `;` separator
* the file does not change name
* the file contains a **unique identifier** column
* the file contains a **name** column
* the date values contained in the file must follow this format: `YYYY-MM-DD`
* the user values contained in the file must be emails by default, but it can
be changed in app at table creation
### Total synchronization
This integrations does total synchronization, meaning the whole document will
be synced at every refresh.
### Refresh Schedule
By default, we perform one Full Refresh per day to keep your data up to date. However, you can customize both the frequency and timing of these refreshes to better suit your needs:
* **Default Schedule**: one Full Refresh per day
* **Customizable Options**:
* Adjust the number of daily refreshes
* Set specific hours for the refreshes to occur
* Configure the schedule through your integration settings
* **On-Demand Updates**: Need the latest data right away? Just click the refresh button in your integration settings